

Windows သုံးစွဲသူတွေအတွက် Free VPN ချိတ်ဆက်ဖို့ဆိုတာ လွယ်လွယ်ကူကူ ပြုလုပ်နိုင်တဲ့အရာပါ။ ဥပမာအားဖြင့် Browser တွေမှာ Free Extensions တွေ နဲ့သုံးနိုင်သလို၊ Nord တို့ Proton တို့မှာလည်း Free Account တွေကို အလွယ်တကူရှာဖွေသုံးစွဲနိုင်ပါတယ်။

ဒါပေမဲ့ Windows 10 မှာလည်း VPN ချိတ်ဆက်မှုကို Built-in ထောက်ပံ့ပေးထားတာကို တွေ့မြင်ကြမှာပါ။ စာဖတ်သူအနေနဲ့ Windows 10 ရဲ့ VPN ကိုပဲအသုံးပြုချင်တယ်ဆိုရင်လည်း လွယ်လွယ်ကူကူနဲ့ အသုံးပြုနိုင်ပါတယ်။ အဲဒီအတွက် အခုဖော်ပြပေးမဲ့အဆင့်အနည်းငယ်ကို စိတ်ရှည်ရှည်နဲ့ လိုက်လုပ်ကြည့်ဖို့ပဲလိုပါတယ်။
အရင်ဦးဆုံး Start Button ကို Right နှိပ်ပြီး Settings ကိုသွားပါ။ ပြီးရင် Network & Internet ကို ဝင်ပြီး VPN ကို နှိပ်ပါ။ ဒါပြီးရင်တော့ Add a VPN connection ကို နှိပ်လိုက်ပါ။ ဒါဆိုရင် VPN setting လုပ်ရမဲ့ထဲရောက်သွားပါပြီ။
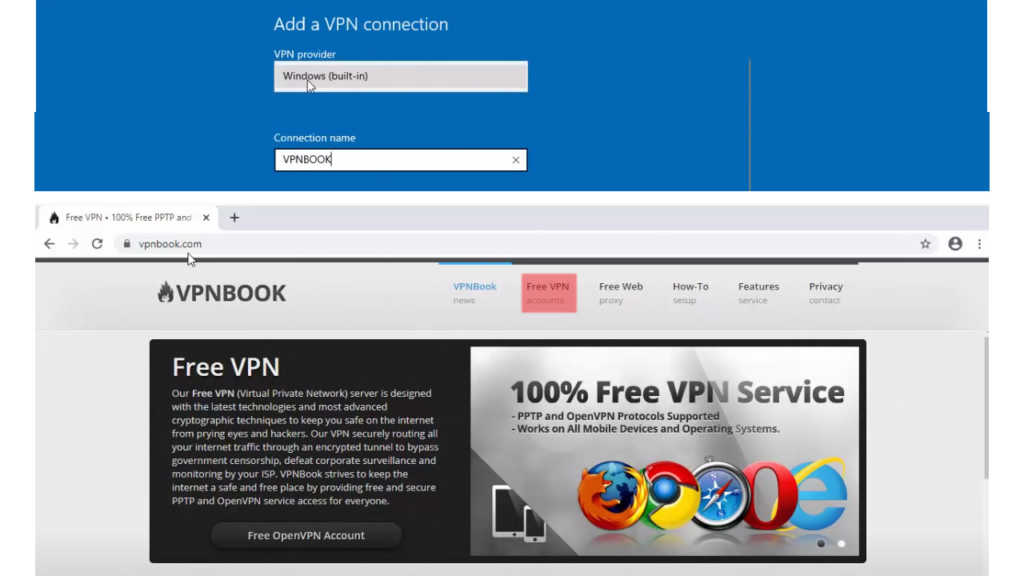
VPN provider မှာ windows (built-in) ကိုပဲ ရွေးပါ။
Connection name မှာ VPNBOOK လို့ ရိုက်ထည့်ပါ။
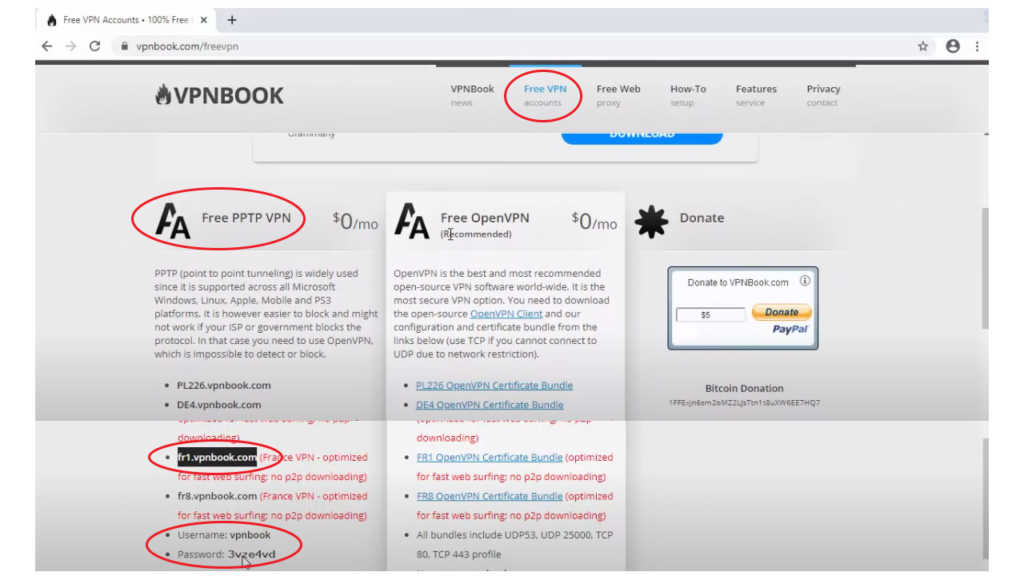
Server name or address အတွက်တော့ Browser ကတစ်ဆင့် vpnbook.com ကိုသွားပြီး အနီရောင်နဲ့ပြထားတဲ့ Free VPN ကို နှိပ်ပါ။ ပြီးရင် Free PPTP VPN ကို ရွေးပါ။ ဒီထဲကမှ နှစ်သက်ရာ Address ကို ရွေးပါ။ ပြီးရင် Address ကို Copy ကူးပြီး Server name or address မှာ Paste လုပ်လိုက်ပါ။
အောက်က VPN type မှာ Point to Point Tunneling Protocol (PPTP) ကို ရွေးပါ။ Type of sign-in info မှာတော့ User name and password ကို ရွေးချယ်ပါ။ အောက်က User name (optional) နဲ့ Password (optional) ကို အလွတ်အတိုင်းထားခဲ့လို့ရပါတယ်။
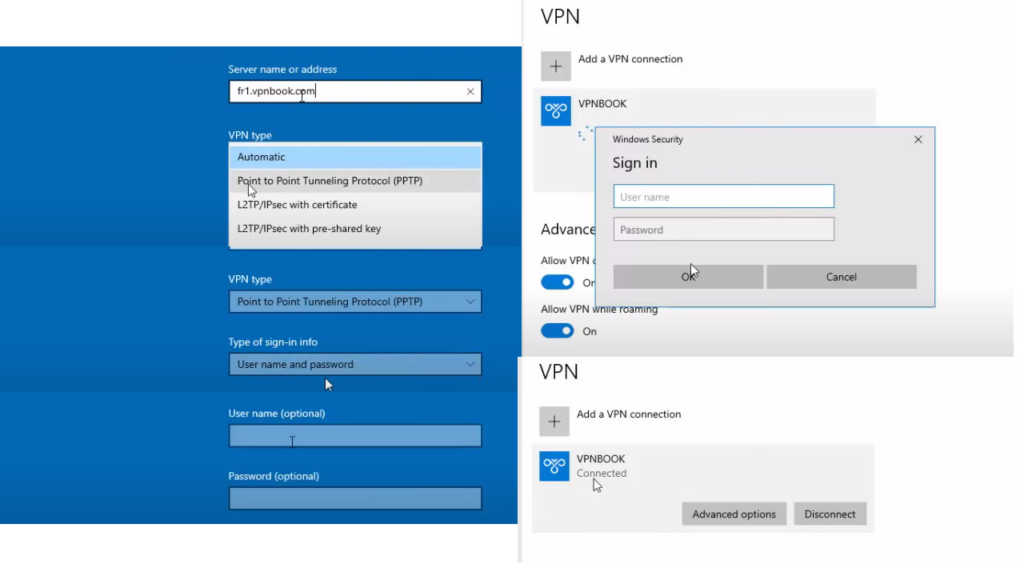
ပြန်ထွက်ပြီး Add a VPN connection အောက်က VPNBOOK နှိပ်လိုက်ရင် Windows Security box ကျလာပြီး Sign in အောက်မှာ User name နဲ့ Password တောင်းပါမယ်။ အဲဒါက စောစောက Browser မှာ ဖွင့်ထားတဲ့ Web page က User name နဲ့ Password ကို ထည့်ရုံပါပဲ။ OK နှိပ်လိုက်ရင် VPN နဲ့အတူ ချိတ်ဆက်ပြီးသားဖြစ်နေပါလိမ့်မယ်။
Ref: Microsoft